
Installing Blynk Server on Ubuntu Cloud Server [Digital Ocean VPS]
If you are planning to install Blynk Server on any ubuntu server, then here is a step by step instruction on how to do that.
When I tried to install the Blynk server on Ubuntu cloud server, I didn’t get a clear guide on how to install blynk server, and I wasted a lot of time. So I thought to share this step by step instruction for users who are looking for such a guide.
My case is little different actually. I own a few domains (
like this blog ashout.com) and I’m running this site on Apache web server on Ubuntu VPS (Virtual Private Server) and I wanted to run Blynk server on my VPS alongside Apache web server without affecting any of my websites.
My question is, is it possible to run WordPress website along withthe blynk server? So that I can install blynk server on my VPS ?
After doing a lot of research I Still couldn’t get an answer to my above question. So I posted this question on Blynk Community. But unfortunately,I didn’t get an answer to that question. But I got some instruction whichI’m missing during my setup and finally, I was able to install Blynk server onmy VPS and also got an answer to my own question.
The answer is, YES. We can install the Blynk server along with Apache web serverand you can run a WordPress website without any issue. But if you follow official instruction then you won’t be able to run Apace web server and Blynk server both at a same time.
What you are going to get in this Guide?
1) Installing Java on Ubuntu Server (Required for Blynk Server)
2) Open 9443 and 8080 Port on Ubuntu server
3) Installing Blynk Server on Ubuntu VPS and Configuring it
4) Configuring and Opening Blynk custom/local server on Blynk mobile app
1) Installing Java on Ubuntu Server (Requied for Blynk Server)
Blynk server needs Java to work. So we need to install Java JDK by executing below commands on Ubuntu server.
Please follow any of the below method and not both method.
Java Installation Method 1: (This is Preferred method because it installs Blynk supported java version on the server)
apt-get update && apt-get upgrade
apt-get install openjdk-8-jre-headless
Once you execute above 3 commands run the below command to confirm java is installed or not.
java -version2) Open 9443 and 8080 Port on Ubuntu server
Blynk needs 9443 and 8080 port needs to be open. To open those ports on ubuntu VPS run below commands.
iptables -A INPUT -p tcp --dport 9443 -j ACCEPT
iptables -A INPUT -p tcp --dport 8080 -j ACCEPT
4) Installing Blynk Server on Ubuntu VPS and Configuring it
To install blynk server on my VPS server I need
mkdir -p /var/www/html/blynkSwitch to that directry.
cd /var/www/html/blynkNow we need to download the latest version of blynk server. To download the latest version of blynk server first visit this page. Under “Assets” right click on the first link and copy the URL path and replace it with below URL path and execute that command.
wget http://mumble2.giize.com/server-0.41.16-java8.jarRun the below command to run blynk server in background.
sudo java -jar /var/www/html/blynk/server-0.41.16-java8.jar -dataFolder /var/www/html/blynk
If you close the server terminal, blynk server will also stops. To avoid that, and to run blynk server always, we need to put below command in crontab.
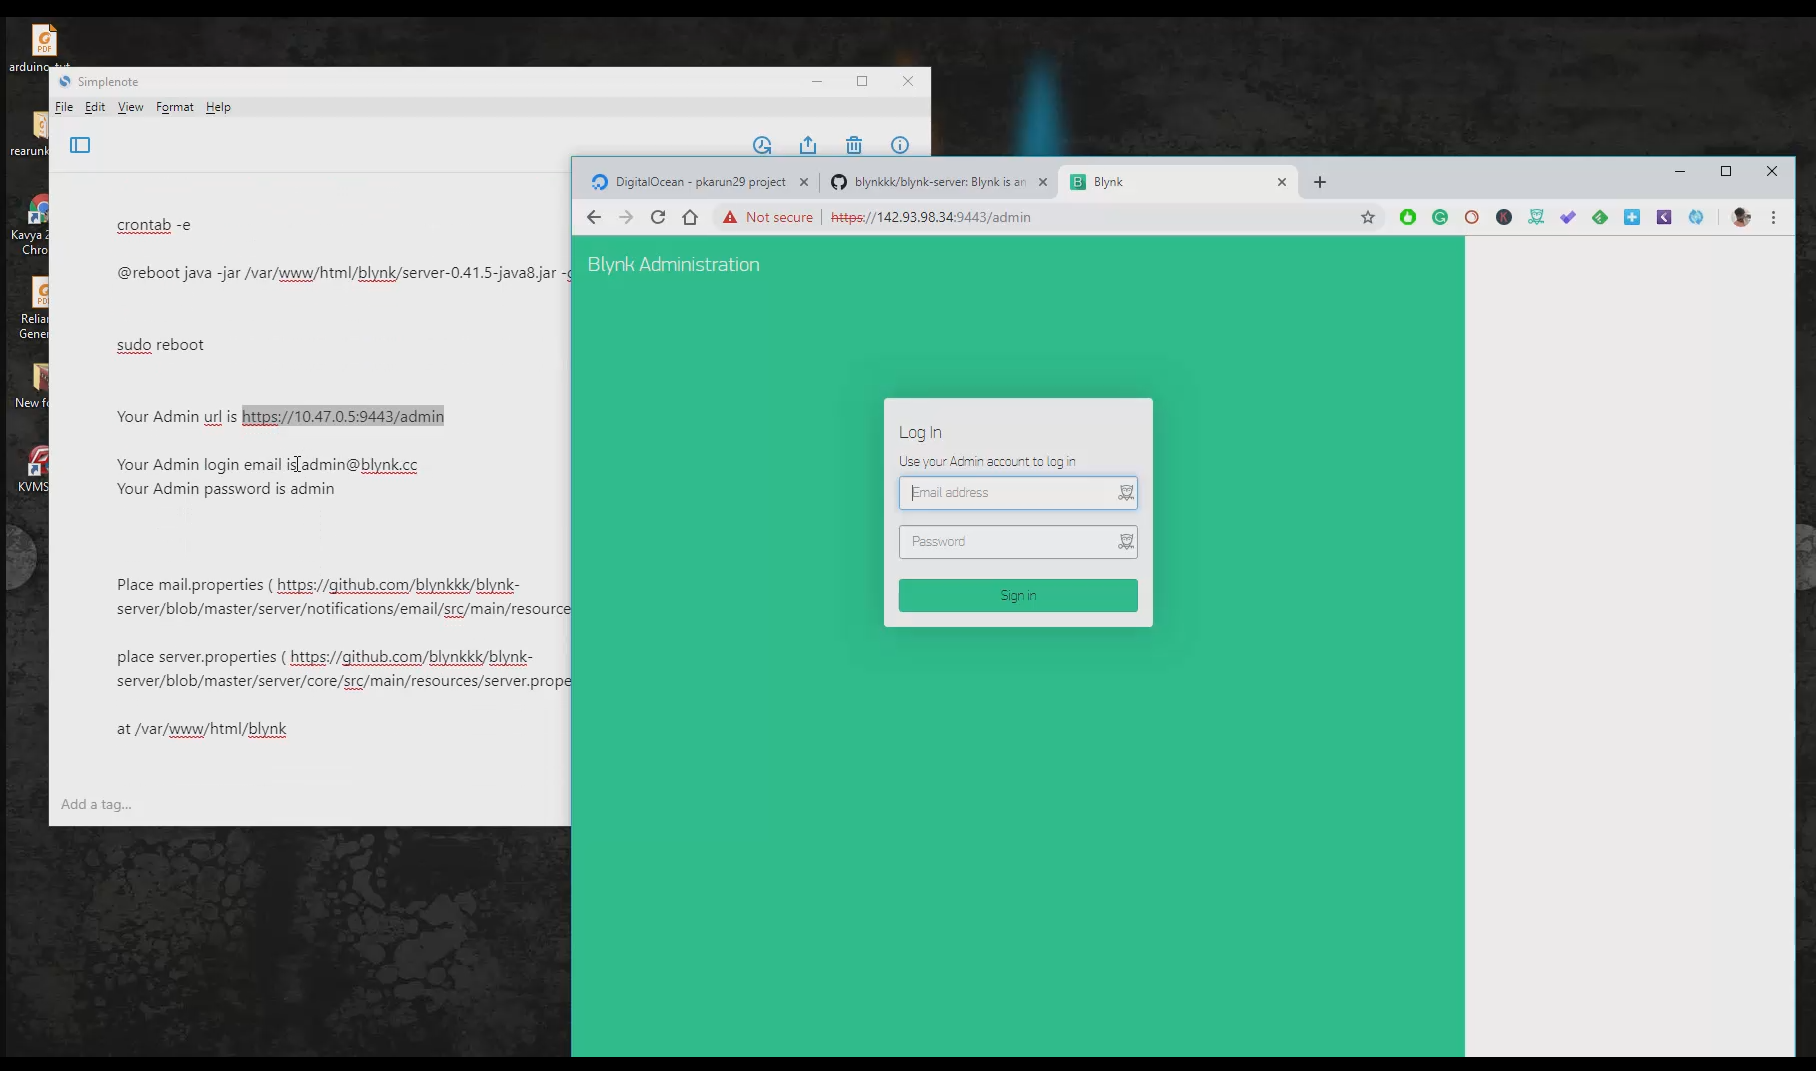
crontab -e

@reboot java -jar /var/www/html/blynk/server-0.41.16-java8.jar -dataFolder /var/www/html/blynk &
After that reboot the server.
sudo rebootThat’s it. Now your blynk server will be up and running. You can access blynk server server by visiting server IP address.
Note: Don’t get fooled by what blynk displays message saying you can access your blynk server by visiting below URL. In that URL blynk usually displays
In my case I can access blynk admin page by visiting:
https://IP-SERVER:9443/admin
By default our login details will be.
Your Admin login email is admin@blynk.cc
Your Admin password is
Now we are able to login to our blynk admin panel successfully.
Enable QR Generation on Server:
Run the below command to enable QR generation on server.
sudo apt-get install libxrender1That’s it.
We are done with server setup. Now you can login on Blynk mobile app.
4) Configuring and Opening Blynk custom/local server on Blynk mobile app
Now use your default blynk user name and password and Server IP address and 9443 port to login to your blynk server.
Note: Don’t use Blynk cloud username and password it won’t work. You need to create new Blynk account on app again with your server IP or you need to use default blynk login details to login.
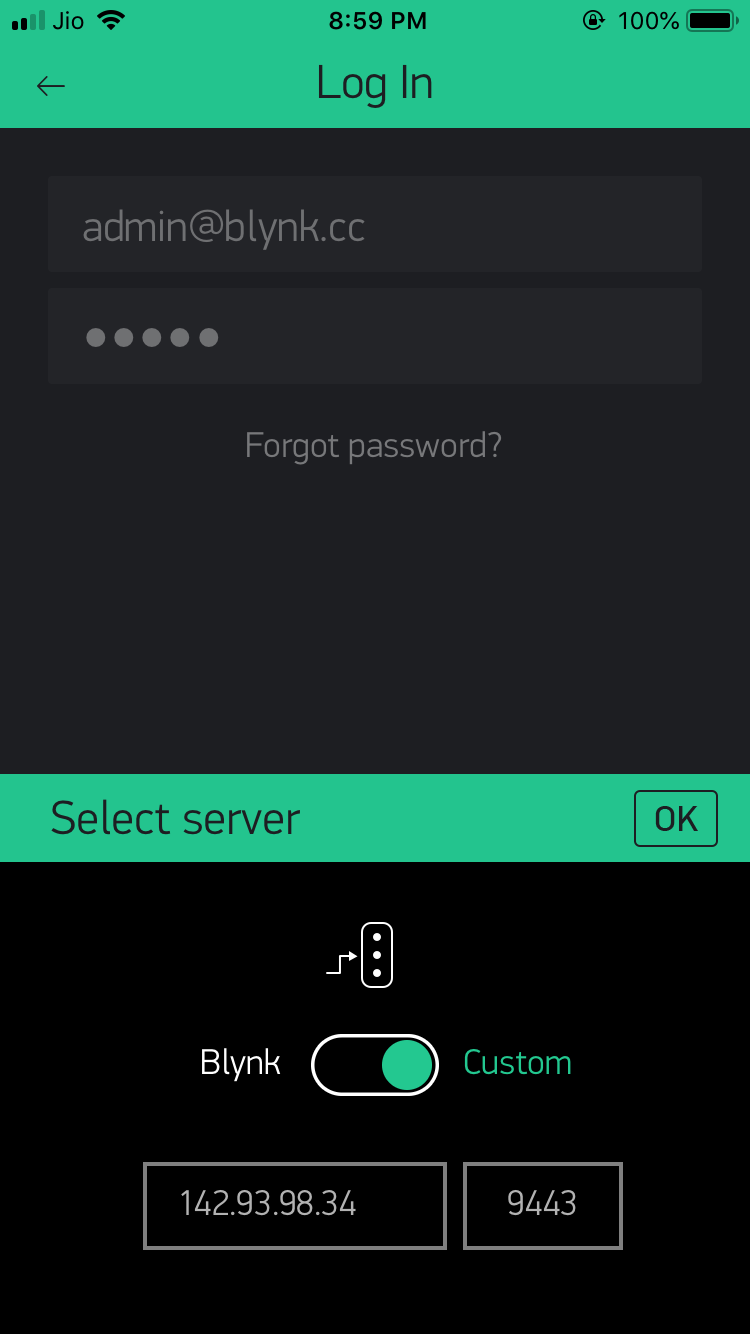
Blynk custom server IP address and Port 9443 entering with default login details to login on blynk mobile app.
That’s it.
Finally now you are able to use your own blynk cloud server.