How to self-host a Jitsi Meet server with password protection


How to self-host a Jitsi Meet server with password protection

Jitsi Meet is a free video conference application. It offers an open-source alternative to proprietary video conferencing applications, such as Skype or Zoom. Anyone can create an encrypted Jitsi video meeting by going to the Jitsi Meet website or installing the free Jitsi app.

The Jitsi Meet service can also be self-hosted. Using the open-source Jitsi Meet server, you can operate private, encrypted videoconferencing on the Internet, on a domain you control.

The following instructions show how to install the Jitsi Meet server on a VPS and configure authorization, so a username and password is required to create new meetings. These steps require an account with a VPS provider, such as Linode or Digital Ocean, and a registered domain name.

Create a Debian 9 VPS


Begin by creating a new VPS for your Jitsi Meet server. In the dashboard of your VPS provider, create a new virtual host running Debian 9, with at least 2 GB of RAM (recommended).

For example, if you are using Linode, from your Linode dashboard, choose Create > Linode. Under Choose a Distribution, select Debian 9 and a Linode plan that offers 2 GB RAM.

Or, if you are using Digital Ocean, from your Digital Ocean dashboard, choose Create > Droplets. Under Distributions, choose Debian 9.12 x64 and a Droplet plan that offers 2 GB RAM.

Update DNS records

Add A/AAAA DNS records to your domain with the subdomain name and the IPv4/IPv6 address of your new VPS.

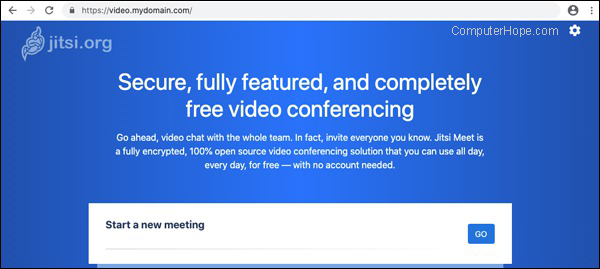
For example, to host Jitsi at video.mydomain.com, log in to your domain registrar account, and edit the DNS records for mydomain.com. Add two records for hostname video, one with the IPv4 address (the "A" record), and one with the IPv6 address (the "AAAA" record).

If you don't want to use a subdomain (e.g., mydomain.com instead of video.mydomain.com), leave the hostname blank in the A/AAAA records.

Upgrade and secure VPS

Open a terminal or command prompt window. SSH to your VPS as the root user.

ssh root@ipaddress

Update the package list and upgrade installed software.

apt update && apt -y upgrade

Install sudo and UFW (Uncomplicated Firewall).

apt install -y sudo ufw

Configure firewall

Configure UFW to allow TCP communication on the ports used by SSH, HTTP, and HTTPS, and to allow UDP traffic on port 10000.

ufw allow ssh
ufw allow http
ufw allow https
ufw allow 10000/udp

Enable the firewall.

ufw enable

Set the hostname of the server to your FQDN, for example, video.mydomain.com.

hostnamectl set-hostname video.mydomain.com

Add the FQDN to your hosts file. Open the file /etc/hosts in a text editor, such as nano.

nano /etc/hosts

Find the line 127.0.0.1 localhost and append your FQDN.

127.0.0.1        localhost video.mydomain.com

Save the file and exit the editor. (In nano, press Ctrl+OEnter to save the file, and Ctrl+X to exit.)

Create a user with sudo rights

Add a new user account. Replace myuser with your desired username.

adduser myuser

Add this user to the 'sudo' group, so it can run commands with sudo.

usermod -aG sudo myuser

Disable root SSH

Open the SSH daemon configuration file in a text editor.

nano /etc/ssh/sshd_config

Find the line PermitRootLogin yes, and change yes to no.

PermitRootLogin no

Save the file and exit the editor (Ctrl+OEnterCtrl+X in nano).

Then, restart the SSH daemon.

systemctl restart sshd

Add SSH key

The following steps add an SSH key to the server to provide stronger security. These steps are optional, but recommended.

If you are still logged in to your SSH session, log out.

logout

If you do not have an existing SSH key, create one on your local machine. (If you have an existing key you want to use, skip this step.)

ssh-keygen
Generating public/private rsa key pair.
Enter file in which to save the key (C:\Users\neilg/.ssh/id_rsa):

Press Enter to use the default public/private key file names.

When prompted, choose a strong passphrase as an additional layer of security.

Enter passphrase (empty for no passphrase): This is my passphrase.

Transfer the key to your server using SSH. On Linux and macOS:

ssh-copy-id myuser@ipaddress

On Windows 10:

cd %USERPROFILE%
type .ssh\id_rsa.pub | ssh myuser@ipaddress "mkdir -p ~/.ssh;
  cat >> ~/.ssh/authorized_keys"

Log in to the VPS using your SSH key.

ssh myuser@ipaddress

When prompted, enter the key passphrase.

Next, disable password-based SSH authentication on the VPS. Open the SSH daemon configuration in a text editor.

sudo nano /etc/ssh/sshd_config

Find the line that reads #PasswordAuthentication yes. Change yes to no, and remove the # to uncomment the line.

PasswordAuthentication no

Save the file and exit the editor. Then, restart the SSH daemon.

sudo systemctl restart sshd

SSH logins are now restricted to users with the public and private key files who know the key passphrase.

As good practice, restrict access to the .ssh directory to your user only.

sudo chmod 600 ~/.ssh/*
sudo chmod 700 ~/.ssh

Install Jitsi Meet server


The following steps install the Jitsi Meet server package on your VPS.

First, enable installation of APT packages over HTTPS.

sudo apt install -y apt-transport-https

Add Jitsi to the list of APT repositories.

echo 'deb https://download.jitsi.org stable/' | sudo tee \
/etc/apt/sources.list.d/jitsi-stable.list

Download and install the public encryption key of the Jitsi repository.

wget -qO -  https://download.jitsi.org/jitsi-key.gpg.key | sudo \
apt-key add -

Update your APT package list.

sudo apt update

Install the Jitsi Meet server.

sudo apt install -y jitsi-meet

When prompted for the hostname of the current installation, enter your FQDN, including the subdomain, if any.

Jitsi hostname

Choose Generate a new self-signed certificate.

Generate self-signed certificate

Next, replace the self-signed certificate with a trusted certificate provided by Let's Encrypt.

sudo /usr/share/jitsi-meet/scripts/install-letsencrypt-cert.sh

When prompted, enter an e-mail address to receive alerts or notifications about your certificate.

Enter your email and press [ENTER]: myaddress@myemail.com

Certificate generation should take less than a minute. When it's done, your Jitsi Meet server is live on the Internet at your domain. You can create new meetings and invite users by sharing the meeting URL.

Jitsi Meet home

However, the application is not secure. Anyone who goes to your domain can create a new Jitsi meeting hosted on your server.

To prevent unauthorized access, the following steps enable authentication, so a username and password are required before a meeting is created.

Configure Prosody

Prosody is a component of Jitsi Meet that provides XMPP communication between users and the server. The following steps configure Prosody to authenticate users who create a Jitsi meeting.

Create a guest domain

On the VPS, switch user to root.

sudo su

Change to directory /etc/prosody/conf.avail/.

cd /etc/prosody/conf.avail/

Open the file fqdn.cfg.lua in a text editor.

nano video.mydomain.com.cfg.lua

In the VirtualHost section for your domain, change the authentication method from anonymous to internal_plain.

VirtualHost "video.mydomain.com"
        ...
        authentication = "internal_plain"
        ...

Above the existing VirtualHost section for your site, insert a new VirtualHost section. The name of this VirtualHost is guest.fqdn. For example, insert the following lines to create a new guest VirtualHost for the site video.mydomain.com.

VirtualHost "guest.video.mydomain.com"
        authentication = "anonymous"
        c2s_require_encryption = false
        modules_enabled = {
            "bosh";
            "pubsub";
            "ping";
            "speakerstats";
            "turncredentials";
            "conference_duration";
        }

Save the file and exit the editor. Then, exit the root account.

exit

Install module storage_memory

An optional Prosody module, storage_memory, enables a temporary memory storage for persistent information, including user session data. The module source code is available from Prosody's Mercurial repository.

Install Mercurial on your VPS.

sudo apt install -y mercurial

Create a temporary directory and change to it.

mkdir ~/temp && cd ~/temp

Clone the prosody modules repository to a new directory, prosody_modules.

hg clone 'https://hg.prosody.im/prosody-modules/' prosody-modules

Copy file mod_storage_memory.lua to directory /usr/lib/prosody/modules.

sudo cp prosody-modules/mod_storage_memory/*.lua /usr/lib/prosody/modules/.

Create a Jitsi anonymous domain

Configure Jitsi Meet to use an anonymous domain for users invited to a meeting.

Open the file /etc/jitsi/meet/fqdn-config.js in a text editor.

sudo nano /etc/jitsi/meet/video.mydomain.com-config.js

In the config variable, in the hosts key, add a new key named anonymousdomain, with the value guest.fqdn.

For example, if your guest domain is guest.video.mydomain.com, the entry should appear as follows. Note that the line ends in a comma.

var config = {
    ...
    hosts: {
            ...
            domain: 'video.mydomain.com',
            anonymousdomain: 'guest.video.mydomain.com',
            ...
        },
        ...
}

Save the file and close the text editor.

Configure Jicofo

Jicofo (Jitsi Conference Focus) is a component of Jitsi Meet that manages user sessions. The following steps configure Jicofo's SIP (Session Initiation Protocol) to use XMPP authentication.

Open the file /etc/jitsi/jicofo/sip-communicator.properties in a text editor.

sudo nano /etc/jitsi/jicofo/sip-communicator.properties

Add a new line with the following configuration. Replace video.mydomain.com with your FQDN.

org.jitsi.jicofo.auth.URL=XMPP:video.mydomain.com

Save the file and exit the editor.

Create Jitsi admin users

Prosody administrative functions are accessed using the prosodyctl command ("Prosody control").

To create a user/password for Jitsi Meet, run the command prosodyctl register username fqdn password.

sudo prosodyctl register alice video.mydomain.com secretpassword123

Repeat this command for any additional users you want to create.

Tip

Only users who create new meetings require an account. Connecting to an existing meeting does not require authorization.

Restart services

To apply the new configuration, restart the affected services.

sudo systemctl restart {prosody,jicofo,jitsi-videobridge2,nginx}

Now, only users with the correct username/password combination can create new meetings on your Jitsi server.

Creating new meetings

Follow these steps to create new meetings on your Jitsi server.

In a browser

On a laptop or desktop computer, open a browser to the address of your Jitsi server.

Under Start a new meeting, type a name for the meeting, and click Go.

Tip

This name appears in the URL you share with invitees. Meeting names are not case-sensitive.

Name Jitsi meeting

Click I am the host.

Verify you are host

Enter the Jitsi username and password you created, and click OK.

Account authentication

If authentication is successful, the conference goes live immediately.

Tip

You only need to authenticate once per browser session. To forget your current login, clear your browser cookies, see: How do I enable, disable, view, or delete Internet cookies?

In the mobile app

Get the Jitsi app for iOS at the App Store, or for Android at the Play Store.

Open the Jitsi Meet app. Tap the menu button and choose Settings.

Jitsi mobile app

In settings, under Server URL, enter the domain of your Jitsi server.

Configure host in settings

Go back to the main app window. Enter a new meeting name, and tap create/join.

Create new meeting

Tap OK.

Verify host status

Enter the Jitsi username and password you created, and tap OK.

Enter name and password

If the app seems to freeze at "Connecting," wait a few seconds for authentication to complete.

How to Install the Traccar GPS Tracking System on Ubuntu 20.04 LTS


Introduction

Traccar is a free and open-source Global Positioning System (GPS) tracking system that is capable of:

  • Tracking various types of GPS devices in real-time,
  • Sending alerts via the web, email, and Short Message Service (SMS) when abnormal conditions are detected, and
  • Providing detailed device location history, map routes, and reports as required.

This tutorial explains how to set up a Traccar server on a Vultr Ubuntu 20.04 LTS server instance in a production environment.

Prerequisites

  • A fresh Vultr Ubuntu 20.04 LTS server instance with at least 2GB of memory. Say its public IPv4 address is 203.0.113.100.
  • A registered domain name for public access. Say it is example.com.

1. Setup DNS Records for Your Server

To ease public access, you need to set up DNS records through your domain hosting service provider, pointing domain names (an apex domain name and one or more subdomain names) to the IPv4 address of your server.

For example, if you are hosting the apex domain name example.com on Vultr, set up DNS records as follows to point example.com and www.example.com to the IPv4 address of your server in the DNS tab of the Vultr control panel:

Type Name Data TTL(seconds) Priority
A
203.0.113.100 300
A www 203.0.113.100 300
MX
example.com 300 10
NS
ns1.vultr.com 300
NS
ns2.vultr.com 300

See detailed instructions on managing DNS through Vultr in this Vultr tutorial.

2. Perform Basic Tasks on the Server Instance

Log in to your server instance as root from an SSH terminal, and then perform basic tasks as follows to harden the system.

Create a swap file:

# fallocate -l 2g /swap
# chmod 600 /swap
# mkswap /swap
# swapon /swap
# echo '/swap    none swap defaults 0 0' >> /etc/fstab
# free -m

Create a normal user named traccar with sudo privileges:

# useradd -ms /bin/bash traccar
# passwd traccar
New pasword:
Retype password:
Passwd: password updated successfully
# echo 'traccar    ALL=(ALL)   NOPASSWD: ALL' | tee -a /etc/sudoers.d/designated
# chmod 0440 /etc/sudoers.d/designated

Set default firewall rules with UFW:

# ufw default deny
# ufw allow 22
# ufw enable

Update and then restart the system:

# apt update
# apt upgrade -y
# apt autoremove -y
# shutdown -r now

Having the server instance up and running again, log in as traccar from an SSH terminal for follow-on work.

Be aware that the tasks mentioned above are for beginners only, and more security measures are at your discretion.

3. Install and Secure MariaDB 10.6

Traccar needs to work with a Database Management System (DBMS), such as MariaDB, MySQL, or PostgreSQL. Use commands listed below to install MariaDB 10.6, the current stable version of MariaDB, on the Ubuntu 20.04 LTS system:

$ sudo apt-get install software-properties-common dirmngr apt-transport-https -y
$ sudo apt-key adv --fetch-keys 'https://mariadb.org/mariadb_release_signing_key.asc'
$ sudo add-apt-repository 'deb [arch=amd64,arm64,ppc64el,s390x] https://mirrors.xtom.com/mariadb/repo/10.6/ubuntu focal main'
$ sudo apt update
$ sudo apt install mariadb-server -y

Start the MariaDB service:

$ sudo systemctl start mariadb.service
$ sudo systemctl enable mariadb.service

Secure the installation of MariaDB:

$ sudo mariadb-secure-installation

In the wizard, answer prompted questions as follows:

  • Enter current password for root (enter for none): ENTER
  • Switch to unix_socket authentication [Y/n] nENTER
  • Change the root password? [Y/n] nENTER
  • Remove anonymous users? [Y/n] yENTER
  • Disallow root login remotely? [Y/n] yENTER
  • Remove test database and access to it? [Y/n] yENTER
  • Reload privilege tables now? [Y/n] yENTER

4. Create a Database and a Database User for Traccar

Log in to the MariaDB shell as root:

$ sudo mysql -u root

In the MariaDB shell, create a database named traccar and a database user named traccar along with its password YourPassword for Traccar:

MariaDB [(none)]> CREATE DATABASE traccardb CHARACTER SET utf8mb4 COLLATE utf8mb4_unicode_ci;
MariaDB [(none)]> CREATE USER 'traccar'@'localhost' IDENTIFIED BY 'YourPassword';
MariaDB [(none)]> GRANT ALL PRIVILEGES ON traccardb.* TO 'traccar'@'localhost';
MariaDB [(none)]> FLUSH PRIVILEGES;
MariaDB [(none)]> EXIT;

5. Install Traccar 4.14

Download Traccar 4.14, the latest stable release of Traccar for now:

$ cd
$ wget https://github.com/traccar/traccar/releases/download/v4.14/traccar-linux-64-4.14.zip

Unzip the Traccar archive:

$ sudo apt install unzip -y
$ unzip traccar-linux-64-4.14.zip

Install Traccar:

$ sudo ./traccar.run

Use the database credentials (database: traccar, database user: traccar, database password: YourPassword) you setup earlier to update the Traccar configuration file:

$ cat <<EOF | sudo tee /opt/traccar/conf/traccar.xml
  <?xml version='1.0' encoding='UTF-8'?>

  <!DOCTYPE properties SYSTEM 'http://java.sun.com/dtd/properties.dtd'>

  <properties>

      <entry key="config.default">./conf/default.xml</entry>

      <entry key='database.driver'>com.mysql.jdbc.Driver</entry>
      <entry key='database.url'>jdbc:mysql://localhost/traccar?serverTimezone=UTC&amp;useSSL=false&amp;allowMultiQueries=true&amp;autoReconnect=true&amp;useUnicode=yes&amp;characterEncoding=UTF-8&amp;sessionVariables=sql_mode=''</entry>
      <entry key='database.user'>traccar</entry>
      <entry key='database.password'>YourPassword</entry>

  </properties>
  EOF

To avoid running the Traccar service as root, which is an unsafe operation in production, change the owner of the Traccar service as follows:

$ sudo mkdir /etc/systemd/system/traccar.service.d/
$ cat <<EOF | sudo tee /etc/systemd/system/traccar.service.d/run-as-user.conf
  [Service]
  User=traccar
  Group=traccar
  EOF

Also, change the owner of Traccar files from root to traccar:

$ sudo chown -R traccar:traccar /opt/traccar

Start the Traccar service:

$ sudo systemctl daemon-reload
$ sudo systemctl enable traccar.service
$ sudo systemctl start traccar.service

Delete Traccar installation files to save space:

$ cd
$ rm README.txt traccar*

Change firewall rules to allow access to port 8082 on which the Traccar service is listening:

$ sudo ufw allow 8082

Open more ports to allow communications between the Traccar server and various GPS client devices:

$ sudo ufw allow 5000:5300/tcp
$ sudo ufw allow 5000:5300/udp

Point your favorite web browser to http://203.0.113.100:8082 to access the Traccar server web interface, and then log in with the default credentials listed below:

  • Email: admin
  • Password: admin

For security purposes, you should change the default password after logging in.

Feel free to navigate your Traccar server website and add your GPS devices. Or, install a Traccar client on your Android or iOS smartphones to enable tracking functionality on them.

The above instructions on deploying a Traccar server on Ubuntu 20.04 LTS is enough for personal use. If your Traccar server is for public access in a production environment, move on to the next steps.

6. Install Nginx 1.20.2

Because the Traccar server listens on the port 8082 rather than the default HTTP port 80, it's desirable to set up a reverse proxy for Traccar using Nginx in production. Follow the instructions listed below to install the latest stable version of Nginx using official pre-built Nginx binary packages.

Install required components:

$ sudo apt install curl gnupg2 ca-certificates lsb-release ubuntu-keyring -y

Import the official Nginx signing key for package authentication:

$ curl https://nginx.org/keys/nginx_signing.key | gpg --dearmor \
      | sudo tee /usr/share/keyrings/nginx-archive-keyring.gpg >/dev/null

Verify the signing key within the downloaded file:

$ gpg --dry-run --quiet --import --import-options import-show /usr/share/keyrings/nginx-archive-keyring.gpg

The output should include this fingerprint: 573BFD6B3D8FBC641079A6ABABF5BD827BD9BF62. If it prints a different value, remove the downloaded file /usr/share/keyrings/nginx-archive-keyring.gpg and then re-run the above importing command.

Setup the apt repository for stable Nginx packages:

$ echo "deb [signed-by=/usr/share/keyrings/nginx-archive-keyring.gpg] \
  http://nginx.org/packages/ubuntu `lsb_release -cs` nginx" \
      | sudo tee /etc/apt/sources.list.d/nginx.list

Setup repository pinning to avoid installing distribution-provided Nginx packages:

$ echo -e "Package: *\nPin: origin nginx.org\nPin: release o=nginx\nPin-Priority: 900\n" \
      | sudo tee /etc/apt/preferences.d/99nginx

Install the latest stable version of Nginx, which is Nginx 1.20.2 for now:

$ sudo apt update
$ sudo apt install nginx

Confirm the installation and learn about installation details:

$ nginx -V

Start the Nginx service:

$ sudo systemctl start nginx.service
$ sudo systemctl enable nginx.service

Change firewall rules to allow HTTP traffic on port 80 and HTTPS traffic on port 443:

$ sudo ufw allow 80
$ sudo ufw allow 443

Disallow direct access on port 8082:

$ sudo ufw delete allow 8082

7. Get Free Let's Encrypt TLS Certificates

In a production environment, valid TLS certificates are indispensable for enabling HTTPS access to the website. Follow the instructions listed below to get free Let's Encrypt TLS certificates for example.com and www.example.com using the Certbot Automatic Certificate Management Environment (ACME) client.

Update the pre-installed snapd program on Ubuntu 20.04 LTS:

$ sudo snap install core; sudo snap refresh core

To avoid conflicts, remove any existing Certbot programs installed using the system package manager or the certbot-auto script:

$ sudo apt-get remove certbot
$ sudo sed -i '/certbot-auto/d' /etc/crontab
$ sudo rm -f /usr/local/bin/cert-bot
$ sudo rm -rf /opt/eff.org

Use snapd to install Certbot:

$ sudo snap install --classic certbot

Create a symbolic link in the /usr/bin directory to ease the use of the certbot command:

$ sudo ln -s /snap/bin/certbot /usr/bin/certbot

Get Let's Encrypt certificates for designated domain names using the Certbot program and its Nginx plugin:

$ sudo certbot certonly --nginx

In the Certbot program, reply to prompted questions as follows to get certificates for example.com and www.example.com:

  • Enter email address: admin@example.com
  • Do you agree to the terms of service? `y'
  • Would you be willing to share your email address with the Electronic Frontier Foundation? n
  • Please enter the domain name(s) you would like on your certificate (comma or space separated): example.com www.example.com

The Certbot program has set up automatic certificate renewal by default to prevent Let's Encrypt TLS certificates from expiring in 90 days. Use commands listed below to confirm those renewals are accountable:

$ sudo certbot renew --dry-run
$ sudo systemctl list-timers | grep snap.certbot.renew.service

8. Setup Nginx as a Reverse Proxy for Traccar

Follow instructions in this section to setup Nginx as a reverse proxy for Traccar in a production environment, which is capable of:

  • Redirecting example.com and its non-www subdomains to www.example.com,
  • Redirecting HTTP to HTTPS, and
  • Disallow direct access to the server's IPv4 address 203.0.113.100.

Create directories to store Nginx server configuration files:

$ sudo mkdir /etc/nginx/sites-available
$ sudo mkdir /etc/nginx/sites-enabled

Backup preset Nginx configuration files:

$ sudo mv /etc/nginx/nginx.conf /etc/nginx/nginx.conf.bak
$ sudo mv /etc/nginx/conf.d/default.conf /etc/nginx/conf.d/default.conf.bak

To increase SSL security, generate a 2048-bit Diffie-Hellman parameters file for Nginx:

$ sudo openssl dhparam -out /etc/nginx/dhparam.pem 2048

Create the main Nginx configuration file:

$ cat <<EOF | sudo tee /etc/nginx/nginx.conf
  user                 nginx;
  pid                  /run/nginx.pid;
  worker_processes     auto;
  worker_rlimit_nofile 65535;

  events {
      multi_accept       on;
      worker_connections 65535;
  }

  http {
      charset                utf-8;
      sendfile               on;
      tcp_nopush             on;
      tcp_nodelay            on;
      server_tokens          off;
      log_not_found          off;
      types_hash_max_size    2048;
      types_hash_bucket_size 64;
      client_max_body_size   16M;

      # MIME
      include                mime.types;
      default_type           application/octet-stream;

      # Logging
      access_log             /var/log/nginx/access.log;
      error_log              /var/log/nginx/error.log warn;

      # Limits
      limit_req_log_level    warn;
      limit_req_zone         $binary_remote_addr zone=login:10m rate=10r/m;

      # SSL
      ssl_session_timeout    1d;
      ssl_session_cache      shared:SSL:10m;
      ssl_session_tickets    off;

      # Diffie-Hellman parameters
      ssl_dhparam            /etc/nginx/dhparam.pem;

      # Mozilla Intermediate configuration
      ssl_protocols          TLSv1.2 TLSv1.3;
      ssl_ciphers            ECDHE-ECDSA-AES128-GCM-SHA256:ECDHE-RSA-AES128-GCM-SHA256:ECDHE-ECDSA-AES256-GCM-SHA384:ECDHE-RSA-AES256-GCM-SHA384:ECDHE-ECDSA-CHACHA20-POLY1305:ECDHE-RSA-CHACHA20-POLY1305:DHE-RSA-AES128-GCM-SHA256:DHE-RSA-AES256-GCM-SHA384;

      # OCSP Stapling
      ssl_stapling           on;
      ssl_stapling_verify    on;
      resolver               1.1.1.1 1.0.0.1 8.8.8.8 8.8.4.4 208.67.222.222 208.67.220.220 valid=60s;
      resolver_timeout       2s;

      # Setup connection header for WebSocket reverse proxy
      map $http_upgrade $connection_upgrade {
          default upgrade;
          ""      close;
      }

      map $remote_addr $proxy_forwarded_elem {

          # IPv4
          ~^[0-9.]+$        "for=$remote_addr";
          # IPv6
          ~^[0-9A-Fa-f:.]+$ "for=\"[$remote_addr]\"";
          # Unix domain socket names
          default           "for=unknown";
      }

      map $http_forwarded $proxy_add_forwarded {

          # If the incoming Forwarded header is syntactically valid
          "~^(,[ \\t]*)*([!#$%&'*+.^_`|~0-9A-Za-z-]+=([!#$%&'*+.^_`|~0-9A-Za-z-]+|\"([\\t \\x21\\x23-\\x5B\\x5D-\\x7E\\x80-\\xFF]|\\\\[\\t \\x21-\\x7E\\x80-\\xFF])*\"))?(;([!#$%&'*+.^_`|~0-9A-Za-z-]+=([!#$%&'*+.^_`|~0-9A-Za-z-]+|\"([\\t \\x21\\x23-\\x5B\\x5D-\\x7E\\x80-\\xFF]|\\\\[\\t \\x21-\\x7E\\x80-\\xFF])*\"))?)*([ \\t]*,([ \\t]*([!#$%&'*+.^_`|~0-9A-Za-z-]+=([!#$%&'*+.^_`|~0-9A-Za-z-]+|\"([\\t \\x21\\x23-\\x5B\\x5D-\\x7E\\x80-\\xFF]|\\\\[\\t \\x21-\\x7E\\x80-\\xFF])*\"))?(;([!#$%&'*+.^_`|~0-9A-Za-z-]+=([!#$%&'*+.^_`|~0-9A-Za-z-]+|\"([\\t \\x21\\x23-\\x5B\\x5D-\\x7E\\x80-\\xFF]|\\\\[\\t \\x21-\\x7E\\x80-\\xFF])*\"))?)*)?)*$" "$http_forwarded, $proxy_forwarded_elem";

          # Otherwise
          default "$proxy_forwarded_elem";
      }

      # Load site-specific configurations
      include /etc/nginx/conf.d/*.conf;
      include /etc/nginx/sites-enabled/*;
  }
  EOF

Create the Nginx configuration file for example.com:

$ cat <<EOF | sudo tee /etc/nginx/sites-available/example.com.conf
  server {
      listen                  443 ssl http2;
      listen                  [::]:443 ssl http2;
      server_name             www.example.com;

      # Use Let's Encrypt SSL certificates
      ssl_certificate         /etc/letsencrypt/live/example.com/fullchain.pem;
      ssl_certificate_key     /etc/letsencrypt/live/example.com/privkey.pem;
      ssl_trusted_certificate /etc/letsencrypt/live/example.com/chain.pem;

      # Add security headers
      add_header X-XSS-Protection          "1; mode=block" always;
      add_header X-Content-Type-Options    "nosniff" always;
      add_header Referrer-Policy           "no-referrer-when-downgrade" always;
      add_header Content-Security-Policy   "default-src 'self' http: https: data: blob: 'unsafe-inline' 'unsafe-eval'; frame-ancestors 'self';" always;
      add_header Permissions-Policy        "interest-cohort=()" always;
      add_header Strict-Transport-Security "max-age=31536000; includeSubDomains" always;

      # Restrict unsafe HTTP request methods
      if ($request_method !~ ^(GET|POST|HEAD|PUT|DELETE)$) {
          return '405';
      }

      # Setup a reverse proxy for Traccar
      location / {
          proxy_pass http://127.0.0.1:8082;
          proxy_redirect http://127.0.0.1:8082/ http://$host:$server_port/;
          proxy_redirect ws://127.0.0.1:8082/api/socket ws://$host:$server_port/api/socket;
          proxy_http_version                 1.1;
          proxy_cache_bypass                 $http_upgrade;

          # Proxy headers
          proxy_set_header Upgrade           $http_upgrade;
          proxy_set_header Connection        $connection_upgrade;
          proxy_set_header Host              $host;
          proxy_set_header X-Real-IP         $remote_addr;
          proxy_set_header Forwarded         $proxy_add_forwarded;
          proxy_set_header X-Forwarded-For   $proxy_add_x_forwarded_for;
          proxy_set_header X-Forwarded-Proto $scheme;
          proxy_set_header X-Forwarded-Host  $host;
          proxy_set_header X-Forwarded-Port  $server_port;

          # Proxy timeouts
          proxy_connect_timeout              60s;
          proxy_send_timeout                 60s;
          proxy_read_timeout                 60s;
      }

      # favicon.ico
      location = /favicon.ico {
          log_not_found off;
          access_log    off;
      }

      # robots.txt
      location = /robots.txt {
          log_not_found off;
          access_log    off;
      }

      # Enable gzip compressions
      gzip            on;
      gzip_vary       on;
      gzip_proxied    any;
      gzip_comp_level 6;
      gzip_types      text/plain text/css text/xml application/json application/javascript application/rss+xml application/atom+xml image/svg+xml;
  }

  # Redirect non-www subdomains to www.example.com
  server {
      listen                  443 ssl http2;
      listen                  [::]:443 ssl http2;
      server_name             .example.com;

      # SSL
      ssl_certificate         /etc/letsencrypt/live/example.com/fullchain.pem;
      ssl_certificate_key     /etc/letsencrypt/live/example.com/privkey.pem;
      ssl_trusted_certificate /etc/letsencrypt/live/example.com/chain.pem;
      return                  301 https://www.example.com$request_uri;
  }

  # Redirect HTTP to HTTPS
  server {
      listen      80;
      listen      [::]:80;
      server_name .example.com;

      location / {
          return 301 https://www.example.com$request_uri;
      }
  }

  # Disallow direct access to the server's IPv4 and IPv6 addresses
  server {
      listen      80 default_server;
      listen      [::]:80 default_server;
      server_name "";
      return 444;
  }
  EOF

Create a symbolic link to enable the configuration file for example.com:

$ sudo ln -s /etc/nginx/sites-available/example.com.conf /etc/nginx/sites-enabled/

Test the changed Nginx configurations and then reload the Nginx service:

$ sudo nginx -t
$ sudo systemctl reload nginx.service

Now it's time to point your favorite web browser to http://example.com to verify the URL redirects you set up earlier. If all goes well, it should switch to https://www.example.com.